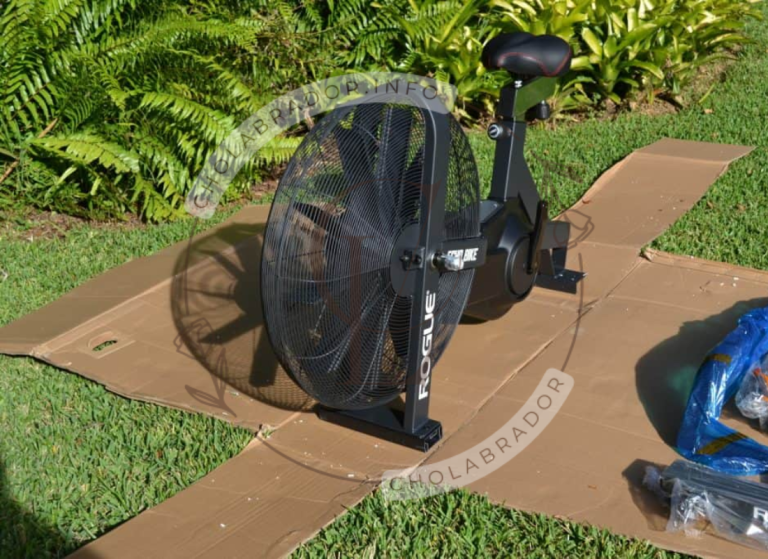
The Rogue Echo Bike is a powerful and versatile fitness machine designed for athletes and fitness enthusiasts who value high-quality equipment. Whether you’re setting up a professional gym or creating the ultimate home workout space, assembling the Echo Bike correctly is crucial to ensuring its performance, longevity, and your safety.
In this comprehensive guide, we’ll walk you through the steps to assemble your Rogue Echo Bike with ease. By following these instructions, you can ensure that your bike is properly set up and ready to take your fitness routine to the next level.
Why Proper Assembly Matters
The Rogue Echo Bike is built with industrial-grade materials and precise engineering. While its design ensures durability and performance, proper assembly is essential for:
- Safety: Ensuring all components are securely attached reduces the risk of accidents during intense workouts.
- Performance: Proper setup guarantees smooth operation and consistent resistance levels.
- Longevity: Assembling the bike correctly minimizes wear and tear on its components.
What You’ll Need for Assembly
The Rogue Echo Bike comes with most of the tools required for assembly, but having a few additional items on hand can make the process smoother.
Included Tools
- Allen wrenches
- Combination wrenches
Additional Tools You Might Need
- Rubber mallet (optional, for snug fittings)
- A flat surface for assembly
- A helper (optional but helpful for stability)
What’s in the Box
Before starting, ensure that you have all the necessary parts and components:
- Main frame
- Fan assembly
- Handlebars
- Pedals
- Seat and seat post
- Stabilizers (front and rear)
- LCD console
- Hardware kit (bolts, nuts, washers)
- Tools and instructions
Step-by-Step Guide to Assembling Your Rogue Echo Bike
Step 1: Prepare Your Workspace
- Choose a clean, flat surface for assembly to ensure stability.
- Lay out all the parts and tools from the box. Double-check that you have everything listed in the instructions.
Step 2: Attach the Rear Stabilizer
- Place the main frame upright and position the rear stabilizer at the back.
- Align the stabilizer’s holes with the frame.
- Use the provided bolts, washers, and nuts to secure it in place.
- Tighten the bolts evenly to ensure stability.
Step 3: Attach the Front Stabilizer
- Position the front stabilizer at the base of the main frame, ensuring it faces the correct direction.
- Align the holes and secure the stabilizer using the included hardware.
- Tighten the bolts to prevent any movement during workouts.
Step 4: Install the Fan Assembly
- Locate the fan assembly and carefully position it at the front of the main frame.
- Attach the fan securely using the provided bolts and washers.
- Ensure the fan spins freely without obstructions.
Step 5: Mount the Handlebars
- Attach the handlebars to the designated mounting points on either side of the frame.
- Use the provided bolts and nuts to secure them tightly.
- Ensure the handlebars move smoothly and are aligned symmetrically.
Step 6: Install the Seat and Seat Post
- Insert the seat post into the frame’s seat tube.
- Adjust the height to your preference and secure it using the adjustment knob.
- Attach the seat to the seat post and tighten the bolts to ensure it’s firmly in place.
Step 7: Attach the Pedals
- Locate the left and right pedals (marked “L” and “R”).
- Thread each pedal into the corresponding crank arm by hand.
- Note: The left pedal tightens counterclockwise, while the right pedal tightens clockwise.
- Use a wrench to tighten each pedal securely.
Step 8: Install the LCD Console
- Mount the LCD console onto the designated bracket on the handlebars.
- Connect the wires from the console to the bike’s main frame securely.
- Ensure the console is firmly attached and displays properly when turned on.
Step 9: Check All Connections
- Go through each connection point, ensuring all bolts, screws, and nuts are tightened.
- Verify that the fan spins freely, the pedals rotate smoothly, and the handlebars move without restriction.
Step 10: Test Your Bike
- Step onto the bike and pedal slowly to ensure smooth operation.
- Test the resistance by increasing your speed and monitoring the fan’s response.
- Use the LCD console to check the tracking of metrics like time, distance, and calories burned.
Troubleshooting Common Issues
Even with proper assembly, you might encounter minor issues. Here’s how to address them:
Loose Components
- If you notice any wobbling, double-check the stabilizers and handlebars for loose bolts.
Uneven Resistance
- Ensure the fan assembly is properly aligned and free of obstructions.
Console Not Working
- Verify that the wires are securely connected. Replace the batteries if needed.
Squeaking or Noise
- Apply a small amount of lubricant to the pedals or moving parts if you hear squeaking.
Maintenance Tips for Your Rogue Echo Bike
To keep your Echo Bike in top condition, follow these maintenance tips:
Cleaning
- Wipe down the frame and handlebars after each use to remove sweat and dust.
- Use a soft cloth and mild cleaner to maintain the fan’s blades.
Regular Inspections
- Check bolts, pedals, and handlebars for looseness and tighten as needed.
- Inspect the fan and belt for signs of wear and tear.
Proper Storage
- Store the bike in a dry, indoor space to prevent rust or damage.
Why the Rogue Echo Bike Is Worth the Effort
The Rogue Echo Bike’s superior design and performance make it a worthwhile investment for fitness enthusiasts. Its heavy-duty construction, advanced air resistance, and user-friendly features ensure it meets the needs of both casual users and elite athletes.
By assembling and maintaining your bike properly, you’ll enjoy years of reliable use and transformative workouts, making it an essential addition to your fitness routine.
Conclusion
Assembling the Rogue Echo Bike may seem daunting at first, but with the right tools and guidance, it’s a straightforward process. By following this step-by-step guide, you can ensure your bike is set up correctly and ready to deliver high-performance workouts at home or in the gym. Take the time to assemble it properly, and you’ll reap the benefits of this exceptional fitness machine for years to come.


